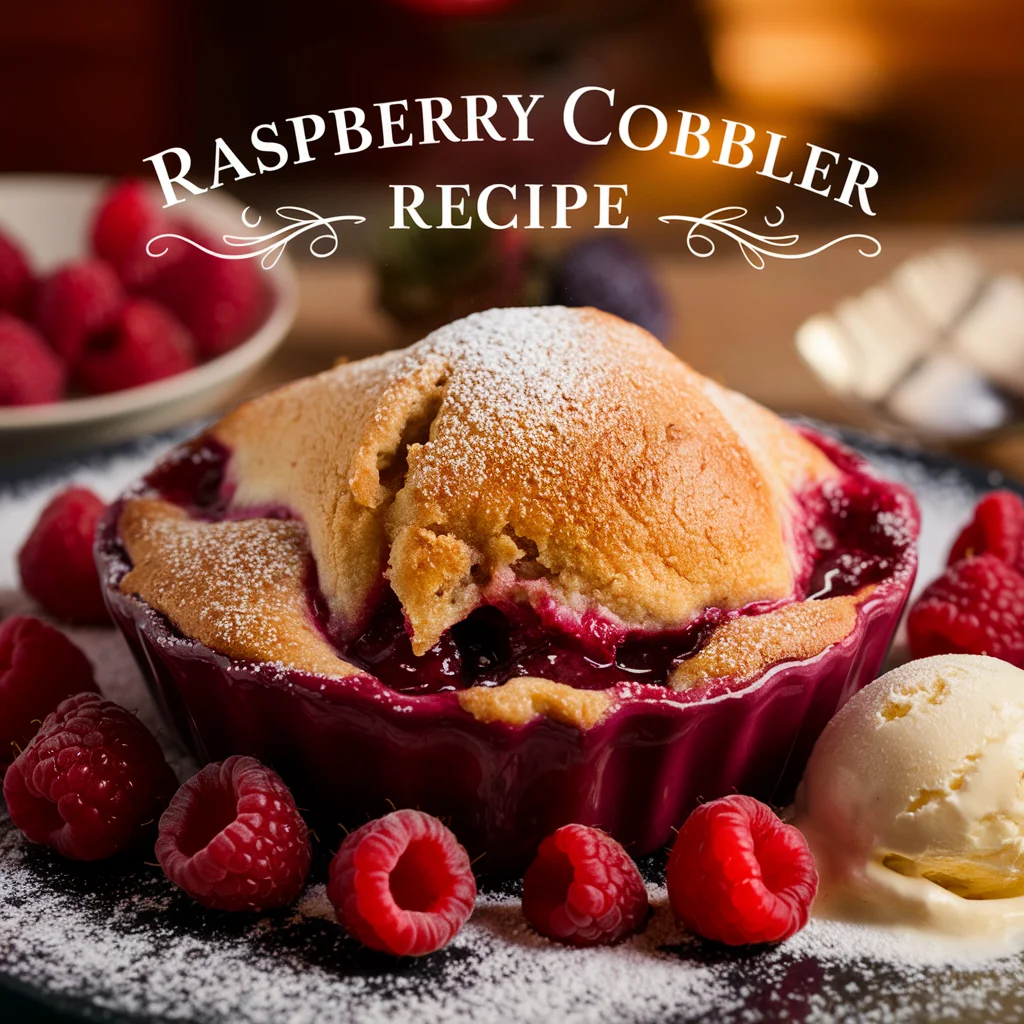
When I got back from the farmer’s market, I wanted something sweet and comforting. I saw some of the juiciest raspberries and thought it was the perfect chance to bake something new. I had this idea to make a raspberry cobbler recipe, something I had never done before. Just the smell of the berries gave me all the inspiration I needed.
As I started mixing everything, the kitchen was filled with a sweet, fruity aroma. That’s the magic of fresh fruit – even a simple raspberry can bring such joy. I’ve baked many desserts, but I can confidently say this one stood out. It was truly delicious and made me feel so proud.
What made the difference was using freshly picked berries. They were ripe, had a natural tartness, and looked so beautiful with their deep red color. When paired with the golden crust, everything just balanced perfectly. Store-bought berries don’t compare. If you haven’t tried it, use fresh fruit – it transforms the whole dessert.
So next time you pass a farmer’s market, grab some raspberries. With just a little effort, you can make a homemade cobbler that feels both rustic and luxurious. Sometimes, one small idea is enough to create something amazing – and it can feel like second nature once you start.
Ingredients You’ll Need
The right ingredients make all the difference in a homemade raspberry cobbler recipe. Below is a breakdown of what you need and why each item matters.
Basic Ingredients List
| Ingredient | Purpose | Tips |
| Fresh Raspberries | The star of the dish | Use ripe, vibrant berries for flavor |
| Sugar | Adds sweetness and balances tartness | You can adjust to taste |
| All-Purpose Flour | For both filling (slight thickener) and crust | Sift for better texture |
| Baking Powder | Leavening for a fluffy biscuit topping | Don’t skip! Gives a lift |
| Salt | Balances flavor | Just a pinch goes a long way |
| Unsalted Butter | Adds richness to the crust | Use cold butter for a flaky topping |
| Milk or Buttermilk | Helps create dough consistency | Buttermilk adds tang and moisture |
| Cornstarch (optional) | Thickens fruit juices | Especially helpful with frozen berries |
| Lemon Juice | Enhances raspberry brightness | Freshly squeezed preferred |
| Vanilla Extract | Deepens flavor | Optional but recommended |
Why Ingredients Matter
- Fresh vs. Frozen: Frozen raspberries are fine, but they release more juice. Add cornstarch to prevent sogginess.
- Butter Quality: Use high-fat European butter for best results. It makes the crust more golden and crisp.
- Low-Sugar Diet? Try monk fruit or coconut sugar as a lower-glycemic option.
Step-by-Step Instructions
Let’s walk through the process with easy steps. This is where most people get overwhelmed, but don’t worry- we’ve simplified every stage.
How to Make Raspberry Cobbler Recipe (Step-by-Step)
- Preheat Oven to 180°C (350°F).
- Prepare the Filling:
- Mix raspberries, sugar, lemon juice, and cornstarch (if using).
- Let it sit for 10 minutes to draw out juices.
- Make the Biscuit Topping:
- Mix flour, baking powder, sugar, and salt.
- Cut in butter using fingers or a pastry cutter until crumbly.
- Stir in milk or buttermilk gently.
- Assemble:
- Pour fruit mixture into a greased baking dish.
- Drop spoonfuls of biscuit dough on top (don’t worry if it looks messy).
- Bake for 35–40 minutes or until the top is golden and filling is bubbly.
- Cool slightly, then serve warm with vanilla ice cream or whipped cream.
Pro Tip: If the topping starts browning too fast, cover loosely with foil halfway through baking.
Baking Tips & Common Mistakes
Even expert bakers can mess up a cobbler. Here’s how to get it right every time.
Tips for Success
- Use chilled butter for the topping- it creates flaky layers.
- Don’t overmix the dough; it should be lumpy and soft.
- Always preheat your oven!
- Use a glass or ceramic baking dish for even baking.
Common Mistakes to Avoid
| Mistake | Why It’s a Problem | Fix |
| Using too much sugar | Overpowers the berry flavor | Taste berries first, then sweeten |
| Overbaking | Dries out the fruit and hardens the crust | Check at the 30-minute mark |
| Adding toppings too early (for frozen) | It may sink into the fruit | Pre-bake the fruit filling for 10 minutes first |
Real-World Example:
A Dubai-based home baker tried baking cobbler with frozen berries and no thickener. The result? A soggy mess. She now adds 1 tbsp of cornstarch and pre-bakes the fruit- problem solved.
Serving Suggestions
Raspberry cobbler is versatile. Whether you’re hosting a dinner or enjoying it solo, here are a few ways to elevate your dish.
Best Ways to Serve
- With vanilla ice cream (classic combo)
- Drizzled with heavy cream or custard
- With a sprinkle of powdered sugar on top
- Add a few mint leaves for a fresh touch
Serving Size & Nutrition (Per Serving)
| Nutrient | Amount |
| Calories | ~270 |
| Sugar | ~20g |
| Fat | ~12g |
| Fiber | ~4g |
Storage & Reheating
Keeping leftover cobbler just as good as fresh is all about proper storage.
How to Store
- Room Temp: Safe for 24 hours (cover loosely)
- Fridge: Store in an airtight container for up to 4 days
- Freezer: Wrap in foil and freeze for up to 2 months
How to Reheat
- Oven: 10–15 mins at 160°C (320°F) for a crispy top
- Microwave: 30 seconds, but the topping may soften
Variations You Can Try
Looking to mix things up? Here are a few tasty ideas:
Fruit Alternatives
- Mixed berries (blueberries, blackberries)
- Peach & raspberry combo
- Cherry cobbler (add almond extract)
Diet-Friendly Twists
| Option | Swap This | With This |
| Gluten-Free | All-purpose flour | Almond or oat flour |
| Vegan | Butter and milk | Coconut oil and almond milk |
| Low Sugar | White sugar | Stevia or erythritol |
Case Study:
A café in Sharjah created a gluten-free raspberry cobbler with oat flour and coconut oil. It became a hit with health-conscious customers and increased dessert sales by 40% in a month.
Printable Raspberry Cobbler Recipe Card
Prep Time: 15 mins
Cook Time: 35 mins
Total Time: 50 mins
Yield: 6 servings
Ingredients
- 3 cups fresh raspberries
- 1 cup all-purpose flour
- 1/2 cup sugar
- 1 tsp baking powder
- 1/4 tsp salt
- 1/2 cup cold unsalted butter
- 1/2 cup milk or buttermilk
- 1 tbsp lemon juice
- 1 tsp vanilla extract (optional)
- 1 tbsp cornstarch (if using frozen berries)
Instructions
- Preheat oven to 180°C.
- Mix raspberries, sugar, lemon juice, and cornstarch.
- In a bowl, mix flour, baking powder, sugar, and salt.
- Cut in butter until crumbly. Add milk and mix gently.
- Pour the berry mix into the dish. Drop dough on top.
- Bake for 35–40 minutes. Let cool before serving.
Seasonality & Sourcing the Best Raspberries
Knowing when and where to get the best raspberries can dramatically improve your cobbler’s flavor and texture. Seasonality plays a big role in both taste and cost-efficiency.
Best Time to Buy Raspberries
| Region | Peak Season |
| UAE | December – March (imported from cooler regions) |
| USA | June – August |
| Europe | July – September |
| Australia | November – February |
Where to Source High-Quality Berries in the UAE
- Carrefour and Spinneys often stock imported berries from Europe and the U.S.
- Ripe Market Dubai and Farmer’s Markets offer organic, small-batch options.
- Try local farms in cooler UAE regions like Ras Al Khaimah (during mild winters).
Quote from a UAE-Based Chef:
“Using in-season raspberries can cut your cost by half and double your flavor.” – Chef Lina Ahmed, founder of Berry Bakes UAE.
Quick Tip
Choose plump, firm berries with a deep red color. Avoid ones that are mushy or dull- they can make your cobbler watery and bland.
Final Thoughts
There’s something timeless and comforting about a raspberry cobbler recipe. It’s a dessert that brings together simple ingredients, bold flavors, and cozy memories. Whether you’re a beginner baker or someone who loves adding a fresh twist to classic recipes, this cobbler offers endless possibilities. The sweet-tart burst of fresh raspberries paired with the soft, golden biscuit topping creates a contrast that feels indulgent but accessible.
We’ve covered everything- from selecting the best berries to understanding how to avoid common mistakes, plus how to store and serve cobbler so it tastes just as great the next day. You now know the difference between fresh and frozen raspberries, how to create variations that fit dietary needs, and even how to get that perfect golden crust. With helpful tips, case studies, and real-world examples from UAE bakers, you can feel confident in your kitchen.
What makes this dessert so appealing is its flexibility. You can make it on a quiet weekend, serve it at a dinner party, or even take it as a warm gift to someone’s home. Its ingredients are affordable, its method is forgiving, and the results are always satisfying. Plus, when made with in-season berries, it can be both economical and full of peak flavor.
So next time you see fresh raspberries at your local store or market, don’t hesitate. Remember, a great raspberry cobbler doesn’t require fancy tools or professional skills- just a little love, good ingredients, and the confidence to try. When it comes to homemade desserts, few things can match the charm and comfort of a well-made raspberry cobbler recipe.
FAQs
What’s the best way to thicken raspberry cobbler filling?
Use cornstarch or flour to help thicken the juices released by the berries during baking. Add 1 tablespoon per 3 cups of fruit for best results. It prevents the cobbler from being too runny.
Can I prepare raspberry cobbler ahead of time?
Yes! You can prep the filling and topping separately, then assemble and bake when ready. Keep both components in the fridge for up to 24 hours before baking.
Is raspberry cobbler better served hot or cold?
It’s best served warm, straight from the oven with a scoop of ice cream or a drizzle of cream. However, it can also be enjoyed cold the next day- it depends on personal preference.
Can I use other berries in the same recipe?
Absolutely. Try substituting or mixing raspberries with blueberries, blackberries, or cherries. Just remember to adjust sugar and thickening agents based on the fruit’s natural sweetness and water content.
How do I know when the cobbler is done baking?
The top should be golden brown, and the fruit should be bubbling around the edges. A toothpick inserted into the topping should come out clean. This usually happens at the 35–40 minute mark.